

If I could tell you that you can have diy curtains in your house without the diy, would you be interested?
Ok there might be a little diy to them but no sewing involved, I promise!!
After looking for the right curtains to go with my farmhouse feel in my living room, I landed on using paint drop cloths. Yep, drop cloths that you put down on your floors so you don't get paint on the them. The weight and color is perfect for the overall feel I'm going for in my space.
So here's the low down. You'll want to have all these tools in addition to your items for the curtains.

Hammer to use for the molly bolts, Screw gun to use on the screws, fabric tape to measure the curtains and sewing pins. Not shown mechanical tape measure, ladder, and level
Head to your local store and grab the drop cloths. I purchased this size because I didn't need very wide fabric, but they will be a little long. Don't fret I have a plan for the extra length
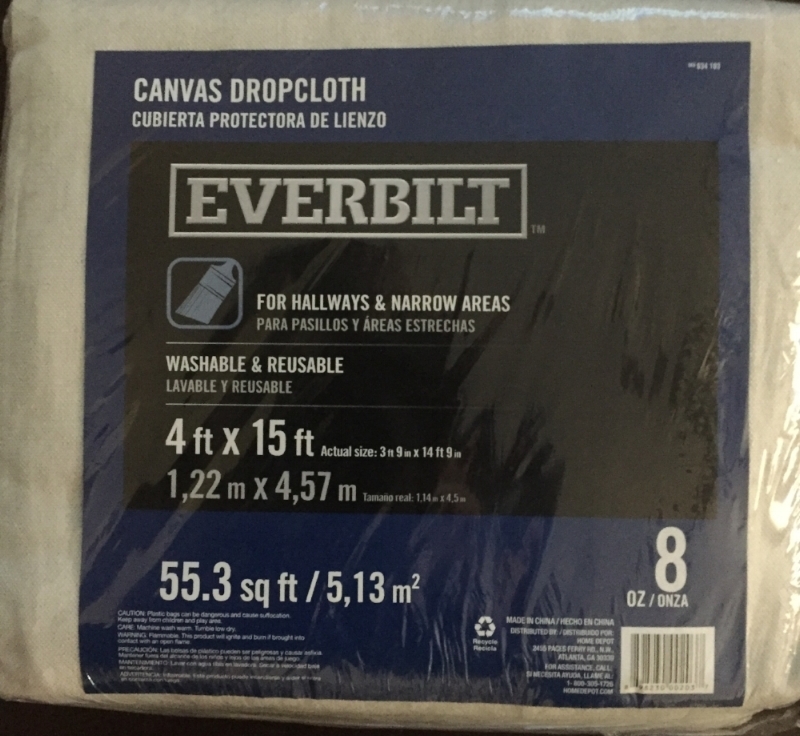
Once you get them home, wash and dry them before using. While I was at Home Depot getting the cloths I also picked up some industrial parts for my curtain rods. I thought it would be an expensive solution by using black plumbing rods. Under $25 for the complete rod! To make this work, below are the needed materials to complete the look.
MATERIALS TO BUILD INDUSTRIAL CURTAIN ROD
All these items will be located in the plumbing aisle at your local hardware store.
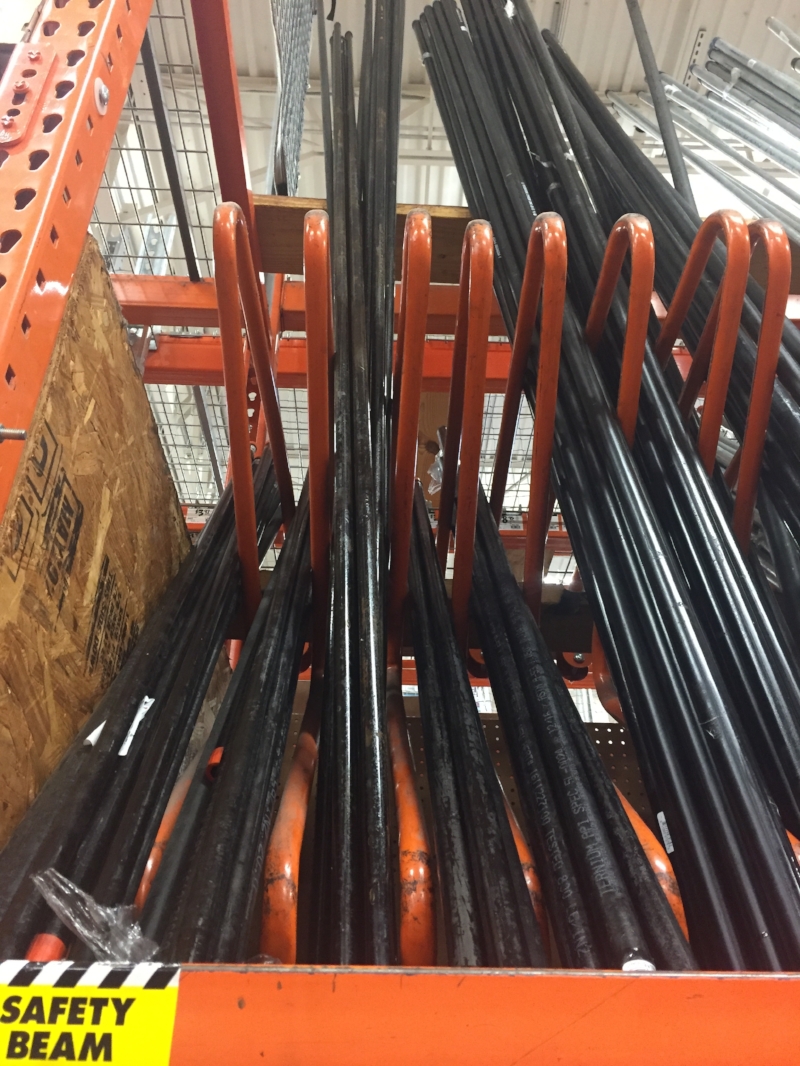
I used 1/2" you could go up to 1"
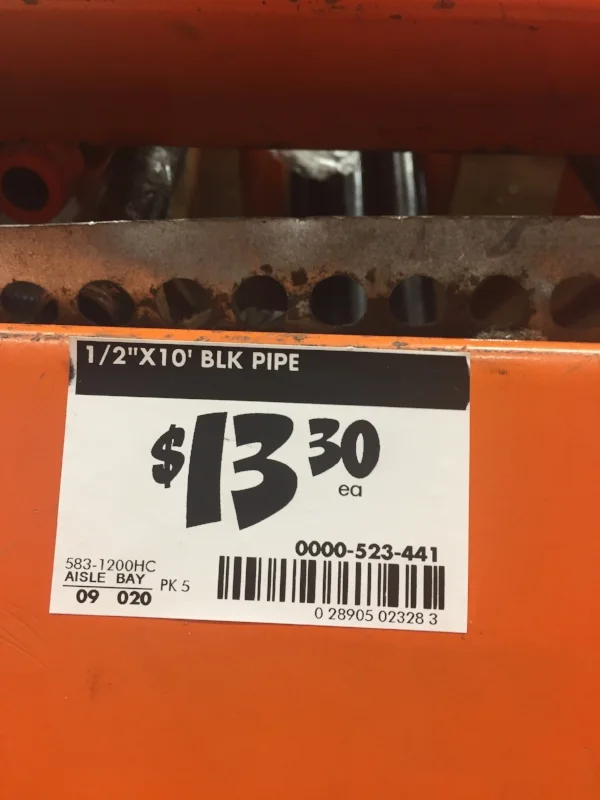
Purchase 1 10' rod

Purchase 2 of these

Purchase 2 of these
Installation of the pipe tips: You will need 2 people to do this. Measure what height you want to place the flange coming from top of window and where on the outer edge of window. Please note ONLY INSTALL ONE FLANGE FIRST. For the first flange, if a stud isn't where the screw will be installed please use a molly bolt instead to keep it firmly in wall. You can just use screws without a molly bolt for the other holes.
PLEASE READ CAREFULLY FOR SECOND FLANGE INSTALLATION The pipe will need to be screwed in for installation to determine where the second flange will be placed. (2 people needed) screw the pipe into the first flange now do the same to the second. Second flange is NOT installed to wall at this time. Hold the rod up with the second flange and mark with a pencil in the screw holes for the installation. Only screw in one molly bolt and screw for the second flange. Now go ahead and unscrew the flange from the wall. Before you finish putting up the second flange you'll want to have your curtain rings on the rod before it gets up there. Trust me!!! I had to unscrew one end one too many times. WHY is all this important? This rod can only be put up by twisting the whole rod in on the second flange side. You will be holding the rod up while screwing it into the wall at same time. Do you remember me saying only screw in one screw? Because while you are up on ladder holding the bar and the flange attached you already have one hole that's got a molly bolt in it. Makes it easy for you to screw the whole curtain rod up. If you install second flange and try to put rod into both like a normal curtain, is NOT possible. Now you may finish by putting all your screws into the remaining flanges, 1st and 2nd.

The elbow and Flange screwed in to wall

There's usually 7 in a package. I already took some out before taking the picture. Purchase 2 packages if your making 3 panels. 3 packages for 4 curtain panels. I used a total of 12, that was 4 rings per panel.
I also needed to pick up something to hang the curtains from on the rod. So I mozied on down (for you non-Texans that means I slowly went to my destination) It's so hard to stay focused when I want to stop and look. So once I made it to the home decor area where their curtains were located I settled on these. The price was good, $7.97 each
Now that your dropcloth (curtain panels) are washed and ready, grab them with your sewing pins and fabric measuring tape and head to the floor. You'll need a big spot to work on them. Confession time... I didn't iron mine before putting them up. I'm looking at them right now and will probably take them down to do it. So if you don't want to do more work, skip the floor first and go to the ironing board. I know I hate ironing too.

STEPS TO GETTING YOUR PANELS PREPARED FOR THE ROD


After you've completed preparing your panels, use this last pic of your pinned places to know where to clip to the hanging rings. Here's an example...


Your now done! YAY!!! Congrats!!!
I had a puddle of fabric at the bottom, if it seems to much to you, go ahead and just pin it up. I did this only because my curtains aren't really used for daily use. If yours will be, you might want to cut it off and then use an iron on hem tape if you don't sew.


I'm still in awe of how easy that was! I just love how the curtains really transformed the space. Another successful DIY project, oops I mean it felt like I labored while making these. Nope out of the package and onto the rod. Thanks for stopping by today. Let me know what you think in the comments.
Don't forget you can follow me at facebook and instagram @welcominghome for more inspiration.